Disclaimer
These are repairs and modifications that have been made to our Scamp to fit our needs. They may or may not
meet various building, safety and/or motor vehicle codes. Any work that is done to your trailer is done at
your own risk and peril. We assume no responsibility
for any of the consequences of any
modifications you attempt and / or implement.
please note:
links with a file size listed after them are links to our pictures.
links without file sizes are off-site links that are related and should
open in a new window.
New Converter
February 2008
We've had several issues with my rear dinette seat and the converter in my '00
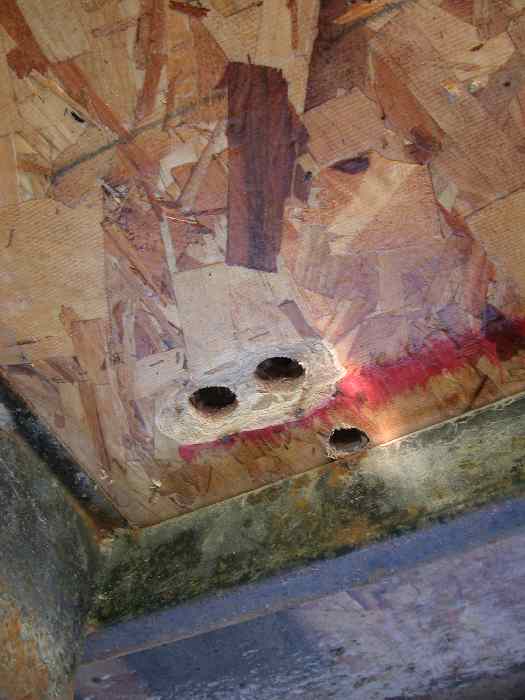
Scamp. The dinette seat itself had problems; the 4 screws that hold it in place
below the converter
had stripped out from the wood they were screwed into and were missing, and the
holes in the
fiberglass for the same screws were seriously elongated and were not
holding anyway. The second problem was
the 12 volt and 120 volt wiring under the seat was a mess. And finally, the
gauge panel indicated a problem with the converter - more often than not the
converter was always pumping over 15 amps into the battery. Sometimes a good
swift whack would resolve the overcharge issue, but the whack was becoming less
and less effective.
Removing the Magnatek 6720 converter, I was reminded just how much of a mess the wiring is under this seat. remembered just how many cables need to be removed, so I decided to resolve that issue - at least on the 120 volt side. I installed an electrical box to terminate the cables to the A/C and curb side outlets. I spliced into this box two short cables and a standard AC power plug. Another cable and plug was attached to the outlet box in the same dinette seat.
These plugs are plugged into pigtail cables I installed into the converter. The heavy input cable still needs to be manually connected as do the 12 volt cables. Speaking of the 12 volt cables, they have been tidied up with a length of split plastic automotive conduit. Here is an in-progress picture of the under-seat wiring. Here is a picture taken after the project was completed.
Ahh, but I'm getting ahead of the story. Once the converter was removed, it was taken apart and the circuit board inspected. I did not find anything like I had shortly after I purchased the trailer new - at that time a component had fallen out of the circuit board and stopped charging; re-soldering it into place resolved the issue. I did however see a couple solder connections that were possibly bad, so they were re-soldered and the converter put back together. The problem still existed, so it was decided to replace the converter. A Parallax Power 6730 was located and determined to be a bolt-in replacement for the old Magatek 6720 - I was hoping the circuit board would bolt-in, but that turned out to not be the case.
I'm again getting ahead of myself. Once the converter had been removed, the fiberglass seat box was also removed. 2 inch by 2 inch blocks were fabricated and bolted to the floor, providing a place to securely bolt the seat bottom with carriage bolts instead of screwing it blindly into particle board with flimsy wood screws.
The finished project works great. It looks a bit different; there are still screw holes that need to be repaired, and the new converter does not have a nice plastic cover. All in all, it works much better and has a 30 percent greater capacity. I accidentally ran the battery dead a few days after installing the new converter and when the converter was plugged in, I saw 20 amps charging the battery. With the old converter, the most I ever saw going into the battery was around 10 amps.
Converter Update - Fall 2008
The new converter worked well enough for a
while, but in the fall of 2008 it failed. Rather than buy another converter for
over $100, we decided to buy a 10 amp automatic battery charger and permanently
wire it into the camper. The new converter's shell is still there (it carries
the 115 volt breakers and 12 volt fuses), but the converter section has been
replaced with the external battery charger. So far, so good!
Miscellaneous Upgrades and Repairs
Modifications from 2005 through 2007 include replacing the entry door latch (we hated having to manually latch the door), inspecting and adjusting the brakes, and replacing our tow vehicle. These will be documented as time and interest allows.
Larger Battery
October 8th, 2004
I installed a new NAPA
auto parts #8270 (by Exide) trolling motor / RV 105 amp-hour / 160 minute
reserve capacity battery for our
Scamp. NAPA was out of stock on a battery box to go with the battery, so I went
to two Checker Auto stores (my comments on Checker Auto - yuck!) to find one. The
one they had was missing the strap that holds the lid on, so the
old strap was re-used.
Once home, I removed the old battery box by twisting the rusted bolts off on-purpose. I then test-fitted the new box. it looked great! I took both of the battery boxes into my garage to drill the holes for the mounting screws and drain holes.
The new box was bolted down with new bolts (that need to replaced with stainless steel in the spring) and test-fitted the cover - it just fits between the propane tanks and front wall of the trailer. I was also a bit concerned if the battery would fit between the top of the battery box and the tube where the sewer hose is stored. As it turns out, everything fits just fine.
Once the battery was installed and the wiring connected (if you do any work on the battery yourself, remember the stock wiring is "black positive") my amp meter (see below) indicated the battery charging at about 4 amps from the converter.
The old battery was considerably lighter than the one I bought. The old one was labeled "marine starting battery", and was probably not a true deep cycle battery.
Cost for the battery was $60 plus tax, and the battery box was $15 plus tax. Time it took to install was less than an hour.
We tested the battery both at home and on a couple trips. The new battery works very well. After being under a moderate load (about 10 amps) for an hour, the converter will charge the battery initially at 10 amps, and taper down to zero amps. I never saw a charge rate of over 5 amps with the worn-out battery.
Late August 2004
Well.... it finally happened to us.
Six miles (or so) from home, at 10:45 pm August 15th, 2004 (late on a Sunday night), I had a tire go flat on my Scamp at speed - about 60 MPH in a sweeping right hand curve on I-694 westbound just before Rice Street in Little Canada, MN.
The event was not dramatic. I was changing lanes because the lane I was in ended (another one of the really poor designs on Minnesota freeways - having to change lanes to stay on the through route - don't get me started on that subject!) when my wife and I heard a sound like a semi pulling up next to us, but we had the road to ourselves. Then there was a vibration and we knew what had happened. I slowed down, pulled off onto the shoulder and decided that we were too far from the exit to pull off the highway. I walked back a few hundred yards with a flare, lit it and walked back to the trailer where my wife was already at work loosening the lug nuts.
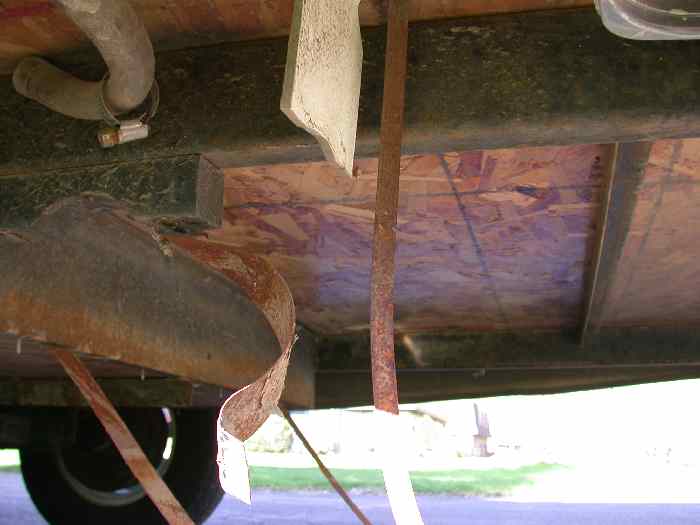
I must confess I had not checked tire pressure in 6-8 weeks. I had checked tire temperature (and bearing temperature) several times during our trip from Minneapolis to Milwaukee and back over the weekend, and none of the six tires on the Jeep or trailer were too warm.
The weather all weekend was in the 70 degree range, so high ambient temperature was not a factor. The only other factor was the tire that had failed had been patched a couple years ago very late in the season - but both tires seemed to loose air at about the same rate. After the tire was removed from the trailer we found what looked like the location of the plug (27k). Did it come out and cause this event, or did it come out because of this event? The world may never know.
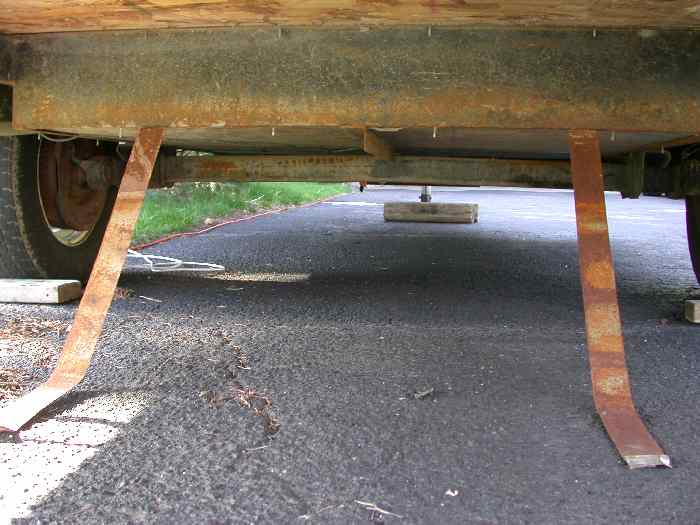
One thing Dawn and I noticed was the tread on both tires was worn more on the right side - the left tire was worn on the inside, and the right tire was worn on the outside. This is not something that concerns me too much, but I think I figured out why the tires wear unevenly. I noticed that the curb side trailing arm appears to have more load on it than the street side. This would cause the whole trailer to tilt a bit to the curb side. In any case, I'm not going to do anything about it as I got 4 years from a set of tires.
I also took the brake drum / hub assemblies in to get the wheel bearings cleaned, inspected and re-packed with grease, and new seals installed as well. I had Dawn, my wife, take ample pictures of removing everything, and I put up a web page under "Tech Tips" about how to remove and re-install the hubs and bearings. I'll leave the cleaning and re-packing part up to someone else.
The bill for tires (ST175-80R13 load range C Goodyear Marathon Trailer Radials, the same as original) and bearing repacking came to $200. Tires were $52.89 each, the seals were $6 each, and new cotter pins were $0.60 each. The garage even balanced the tires without me having to ask. Labor for tire mounting, balancing and bearing repack came to about $80.
I also noted the serial number on the blown tire for anyone who is interested - it is PLJV VLOR1100
We were very lucky. We were almost home, and we had a good spare and the tools needed to install it on the camper. Traffic was also quite light, and the flat tire was on the right side of the trailer. If this was a left side flat, I would have had more flares out, further back and also in the driving lane to get folks to slow down and not hit me.
The lessons learned from this is to not ignore your equipment, or you will pay the consequences. I not only replaced both tires, I also repacked my wheel bearings before bad things happened to them. Also, be prepared for this sort of minor problem as well.
August 2004
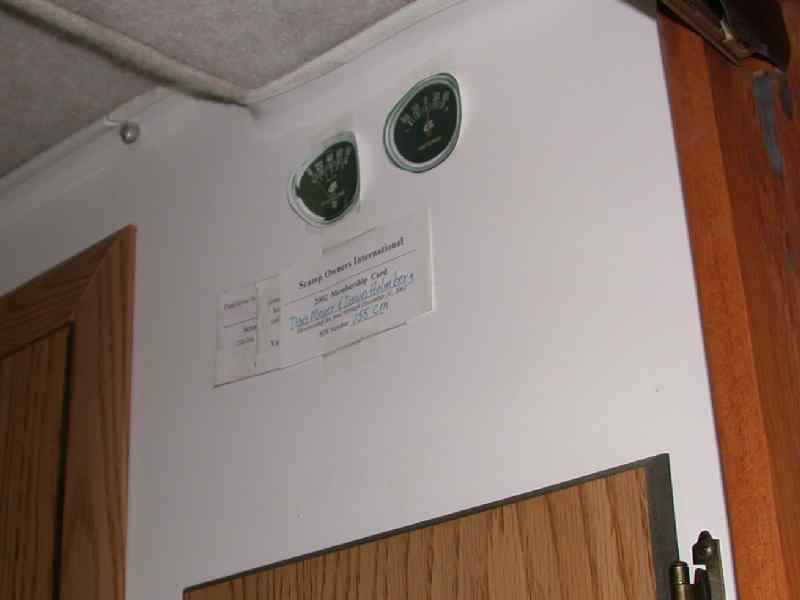
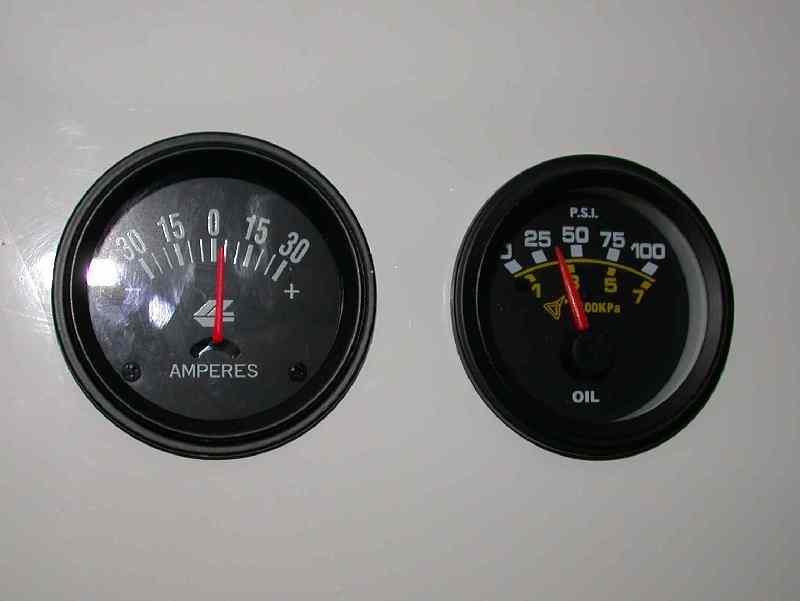
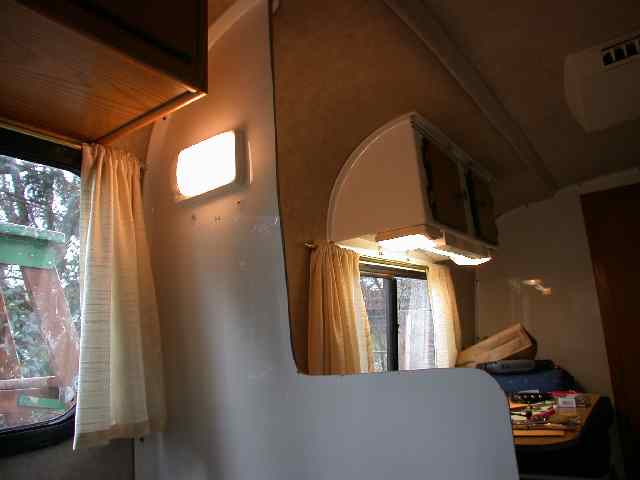
After installing an inverter in my Scamp, I thought it
would be useful to be able to monitor battery voltage and current. While I was
at it, I decided to monitor water pressure and outside temperature also. To
evaluate what this installation would look like, I
taped
pictures of the gauges to the wall (16k) where I
proposed to install the gauges for the duration of a weekend trip. They looked
good so we decided to move ahead.
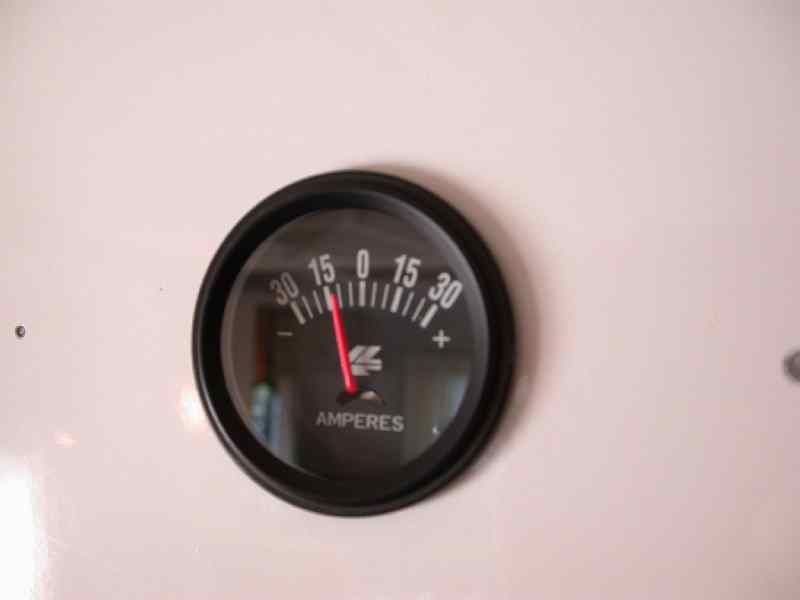
I bought an automotive amp meter (30 amp full scale) and an automotive oil pressure gauge, and spent an afternoon installing them. Later I bought a digital voltmeter and digital thermometer. I spent about $200 in parts and supplies, and it took about 4 hours to install everything.
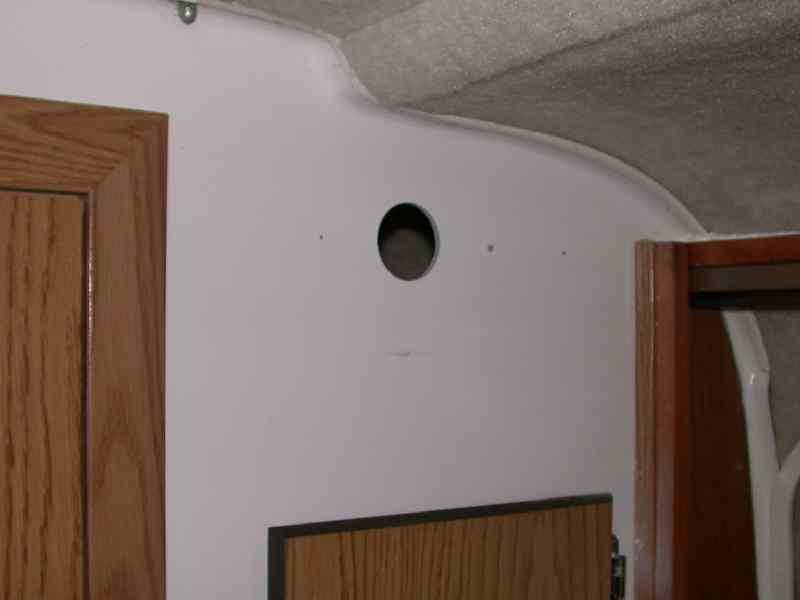
The first thing I needed was a template to mark the holes I would be drilling in the camper. This step I didn't want to mess up, as I was drilling into a large fiberglass panel that would be difficult to repair or replace! I made a template using Visio on my computer, taped it to the wall and drilled 1/8 inch pilot holes part way through to mark the center of each of the four gauges.
To install the gauges, I needed a two-inch hole to mount the gauges through the panel. I bought a hole saw at my local hardware store, and test-drilled a hole in some old paneling I have in my garage. The resulting hole was too small for the gauge to fit. This problem was resolved by taking a strip of sandpaper and attaching it to the hole saw (6kb) with a piece of tape, bending over the leading edge, and drilling it through the too-small hole. The result was a perfectly sized hole (14k).
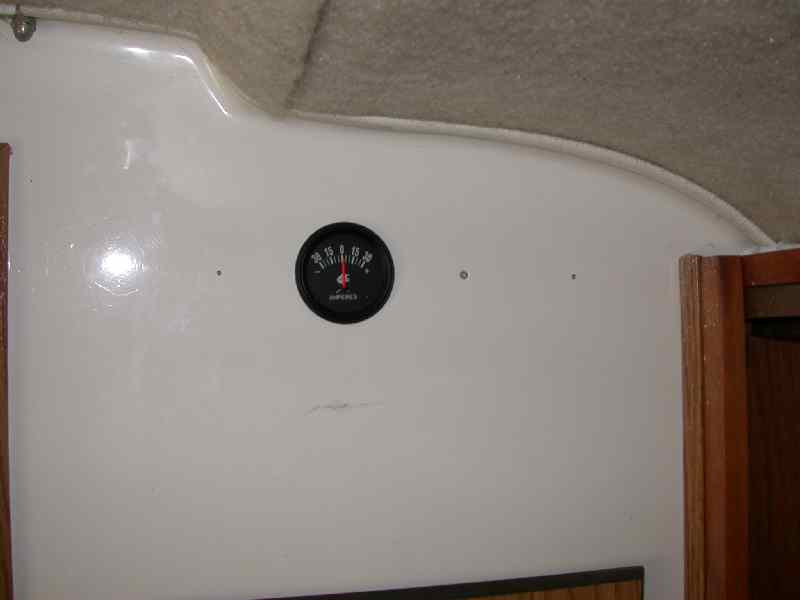
I drilled the hole for the amp meter, and reamed it slightly larger as detailed above. It worked out great (12k)! I started work on the wiring. I ran a new 10 gauge wire out to the camper battery, fused it with a 30 amp fuse at the battery, and connected it to my new gauge. I ran another wire from the gauge to my inverter's positive binding post, and finally another wire from the inverter positive to the original positive feed to the camper.
I reconnected the battery, and tested the meter. It works! With all lamps turned on, I can pull about 10 amps (11k) from the battery. When I turn on the converter, the meter shows that the battery is being charged for a few minutes, and the charge tapers off nicely to zero.
Next I installed the pressure gauge. I drilled the hole and enlarged it as detailed above, and installed it in the hole. I ran the tubing down to the lower compartment, preparing it to connect to the hot water line to the shower faucet. I installed a "T" fitting in the water line, and connected the tube to the gauge. The gauge worked, but I had leaks all over my newly installed "t" fitting. Since the fitting was plastic, I didn't think that Teflon tape was needed. I was wrong. Teflon tape was needed on two of the three connections (the third connection used an "O" ring to seal and Teflon pipe tape was not needed). After everything was re-installed, the pressure gauge worked (45k) and none of the fittings leaked!
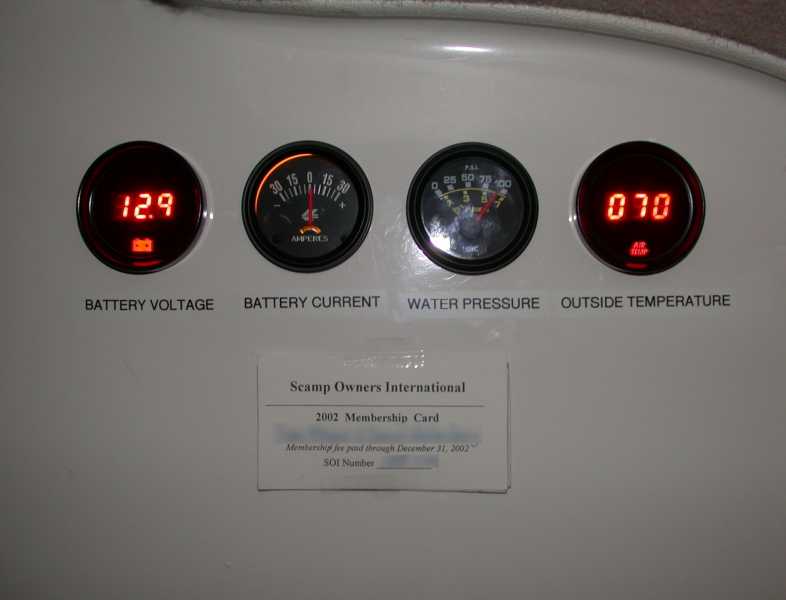
A few days later the digital voltmeter and thermometer arrived. Their installation went very smoothly, and took even less time than the first gauges. The result looks very nice (19k). The water pressure is reading very high because the water heater was just turned on, and the heated water is exerting a lot of pressure on the plumbing. As it turns out, the trailer's water pump can supply about 40 pounds pressure, and the city water connection also supplies about 40 pounds when fed through the water pressure regulator. Full city water pressure in my town is about 65 pounds.
UPDATE: I replaced the pressure gauge with one that reads up to 150 pounds. It turns out that firing up the water heater cold results in water pressure of over 135 pounds!
July 2004
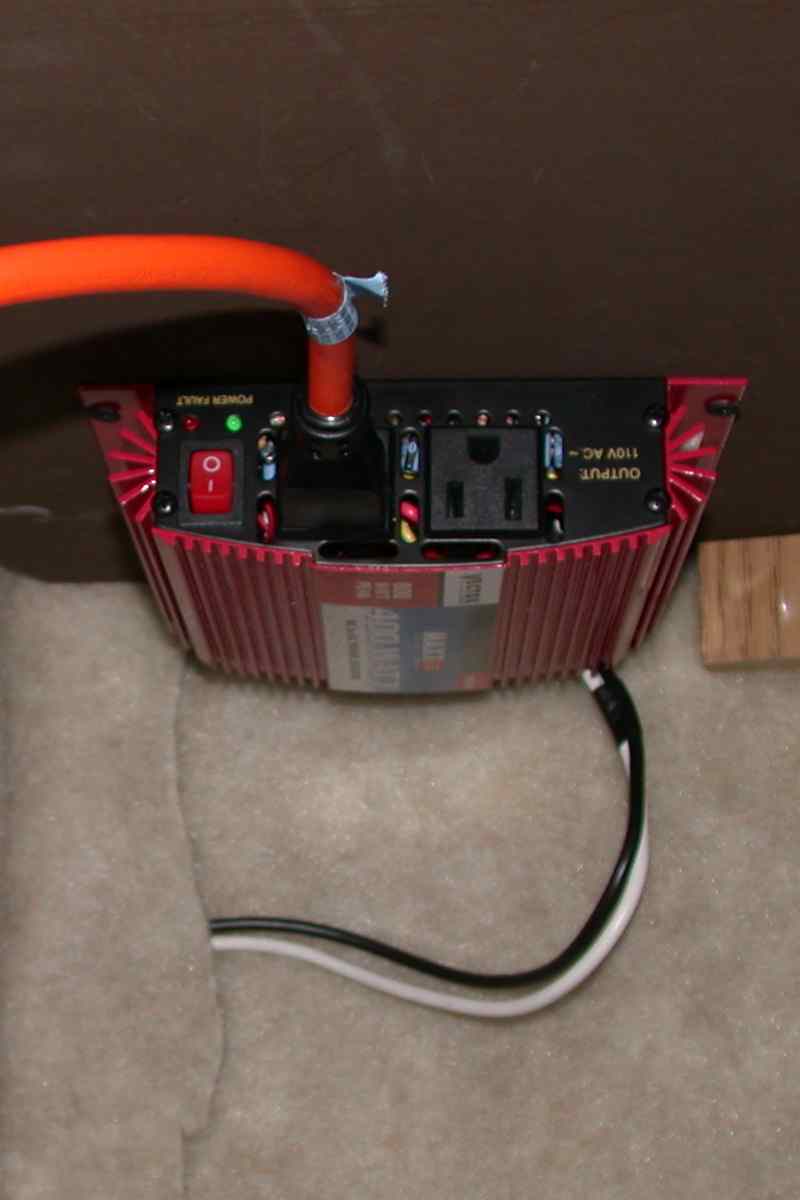
I recently bought and installed a 400 watt inverter in
our trailer. This will allow us to use our computer and recharge our cell phones
and use other electronic gear that require 120 volt AC poser while dry camping.
Because the inverter needs to be connected to the camper's battery with fairly heavy cables, I decided to install it in the front closet hung on the bottom of the top shelf (29k). This will insure adequate cooling air, and it will not be damaged by items placed in the bottom of the closet.
Since AC power for the trailer enters in the left-rear locker, a cable needed to be installed to carry power from the inverter to the locker where the trailer's power comes in, which is located at the left rear of the trailer. I bought a 25 foot 14 gauge 3 wire extension cord and cut off one end, and fished it from the front closet routing it under the bathroom, following the existing 12 volt power wires and hot and cold water lines. This part of the job would have been much easier if I had an electricians fish tape. I did not have one, so I made do by attaching a length of coat hanger wire attached to the end of the new cable and pushing it through until it came out the other end. This was about as difficult as I expected. It took about 90 minutes to get this installed, and the air conditioning was very welcome considering the humidity. The job would have been unbearable without the A/C.
Running the new cable behind the furnace and under the carpet was a no-brainer, and went very quickly. Once the end of the cable was in the left-rear locker a new cable end was attached, and I called it a day.
A day or two later I installed the cables to the battery. I replaced the existing cables that ran to the battery so I could be sure that the cables are in good condition and adequately sized for the job. Removing the old cables that lead to the battery and sneaking the new cables into place was a bit more difficult than I anticipated, but it was no means a hard as pulling the new 120 volt cable under the bathroom. Once the cable was in place and polarity correct to the battery (whose idea was it to make *black* is positive!?!?), I connected the inverter that I had previously attached inside the closet.
I also re-wired my breaker panel. Previously the left and right side outlets were on separate circuit breakers, with the breaker that controlled the street side outlets also controlling the converter. Now the converter is on its own breaker, and I can turn it off while using the inverter (perpetual motion doesn't work, and a fuse will blow to prove this point). I have also posted inverter operating instructions that include to not waste power running the 'fridge off 120 volts while on the inverter. Ideally the 'fridge would run off the same breaker as the converter, but that would require running a new cable out to the 'fridge outlet. This might be a future project.
Testing revealed that the inverter works very well. However, our three season old battery seems to lack capacity. I don't have any hard numbers yet, but the battery is only a group 24 marine battery and when new has about an 85 amp hour capacity. I'll do more testing and report on how long we can run the inverter before depleting the battery.
UPDATE: I've tested the battery, and with about a 10 amp load it lasts about an hour before being depleted to 10.5 volts. The inverter did hold up for about three hours running a laptop computer with no problems. Time for a new, larger battery!
UPDATE II: A New size 27 battery has been installed, and works a lot better than the original battery. I did a brief test by turning on all the 12 volt lights in the trailer, and I pulled about 8 amps for 1.3 hours. Battery voltage never went below 11.8 volts or so! When the lights were shut off and the converter powered up, the new battery was accepting a charge of almost 10 amps. I never saw over 5 amps charge the original battery.
May 2004
I've had a small drip from where the outlet for the gray
water tank fits into the tank for a long time. In May 2004 decided to repair the
tank.
To begin, I removed the tank from the Scamp, and prepared to clean the fitting. I figured that the connection was your typical solvent welded connection, and I could simply apply more solvent over the connection and seal things up.
When I dropped the tank on the ground while cleaning, I heard something split and I figured that I'd made a small job even bigger. As it turned out, the two 90 degree elbows and outlet valve had simply been jarred loose from the tank. I found that this drain valve assembly is held on only by silicone type caulk.
The tank was pretty easy to remove. To remove the tank, first, detach the vent line, sink drain (these are found inside the trailer, under a rear dinette seat.) and shower drain lines. Next, remove the screws holding the tank flange to the bottom of the trailer. Then remove the two straps holding the drain valve assembly (22k) in place. Finally, support the tank and remove the straps holding the tank in place (36k), then lower the tank to the ground (44k).
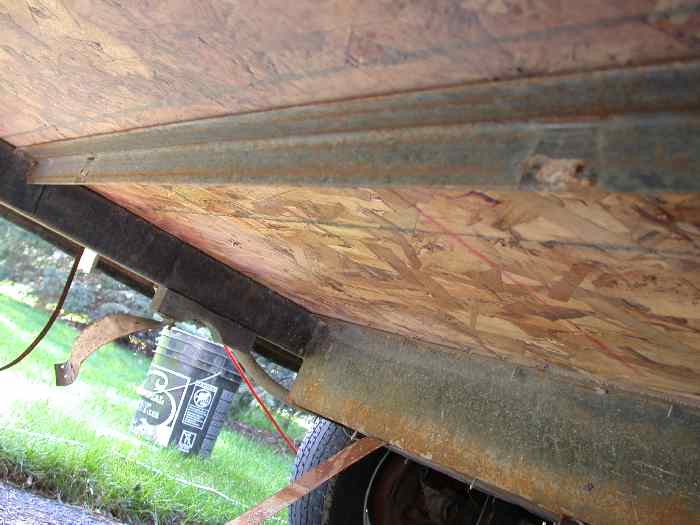
Before installing the tank I painted the frame where the tank obstructs access (31k - this is a before painting photo), and also the underside of the floor (30k) where the holes for the tank vent and sink fittings go. I also found a screw holding one of the rear dinette benches protruding through the floor. Thank goodness that it had not penetrated the tank! This screw was removed, shortened and re-installed.
I then slid the tank into place and supported it with a jack. Next, I installed the straps that hold it into place. Lining up one of the holes the flange with the corresponding hole in the floor above, and put the screw in. I then lined up a screw hole on the opposite end of the tank, and installed the screw. The rest of the holes in the flange just fell into place.
I re-attached the gray water outlet, and it does not leak! However, I've found another small leak when I filled the tank about half way. It appears the fitting where the shower drain line goes into the tank leaks.
I cleaned the existing silicone around the shower drain inlet on the gray water tank a few days ago, and after it dried completely I applied more silicone over the existing silicone. I tested it by using the shower (right in my own driveway ). I used only about 6 gallons of fresh water, so I pumped another 10 gallons from the freshwater tank into the sink. With the resulting 16 gallons or so in the gray water tank, there are no leaks from the gray water holding tank or fittings!
Fall 2003
This isn't really a modification to the trailer, but close
enough. Last summer my brother-in-law found an old watt hour meter at a surplus
house cheap, and he gave it to me. I decided that it would be neat to meter the
power used by the trailer. I went looking for an electrical box to mount the
meter in. I found them at Home Depot, but $100 price tag was too much money
to spend. I finally found one on E-Bay for about $30. While waiting for the box
to arrive, I figured out how to reset the meter to zero and also how to
connect it to the power line. A couple days after all the hardware had been
collected, I had an electric meter hung on the shed in the backyard next to
where I park the Scamp. It turns out that the Scamp uses almost no power while
just sitting there. If I run the electric heater or A/C, the power consumption
goes way up. Since installed last fall, I used about 1000 KWH of power through
the winter.
It's August 1st, and the meter reads about 1360 or so. Compared to my total power consumption, this is not much. Pictures
to come sooner or later.
Fall 2004 update:
The trailer has used around 1180 KWH while sitting at home. That works out
to about 100 KWH per month, or about $8 per month. Most of the electricity was
used for heating and cooling while the camper was being used as an
office space.
March 2008 update;
I've been running all power for the trailer through the power meter while at
home since the meter has been installed. The reading on March 1, 2008 is 3108
KWH. At the rates charged for electricity here, my cost for electricity in the
trailer is under 20 cents per day.
June 26th 2003
After dealing with a temporary 12 volt outlet hanging loose at the end of a
couple of wires for way too long, I installed a 12 volt outlet in the overhead
cabinet over the side dinette table. As it turns out, there is too much voltage
drop to use this outlet to power a ham radio transceiver, but it works very well
to charge batteries for a digital camera, cell phone or other low current 12
volt device.
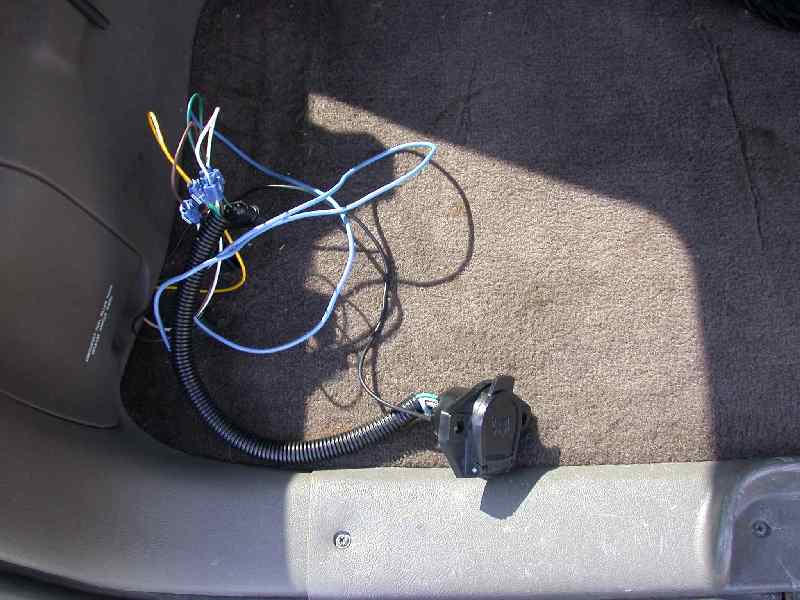
April 12th, 2003
After owning a Scamp travel trailer for 2 1/2 years, it was time to tidy up the
electrical
connector that was loose (45k) in the back of our Jeep
Grand Cherokee. A
bracket (34k)
was found at
Hilltop
Trailer sales and painted and attached to the floor near the spare tire of
the Jeep. The defective Hoppy Taillight Converter was replaced (the
tail lamps turned on as soon as the trailer was plugged in - brake lights and
turn signals worked fine), and the plastic receptacle was replaced
with the metal one that Scamp had originally supplied. The result is a
big
improvement (27k) over the mess that we had
previously.
November 23rd, 2002
The lamp on the panel that separates the side dinette from the rear dinette
became intermittent late in the summer of 2002. It would work properly at seemingly
random times. Opening and closing the drawer under the side dinette chair would
sometimes make the lamp work, but as the summer wore on, the problem got
worse.
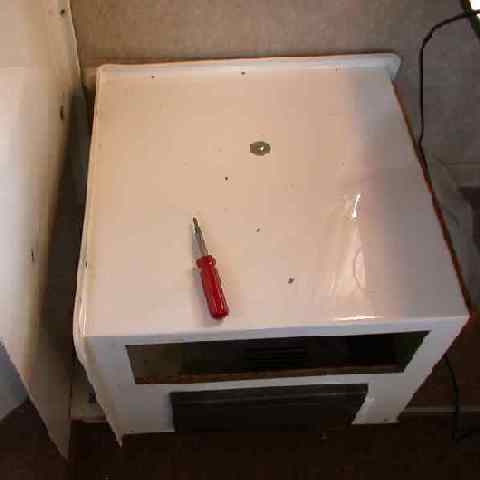
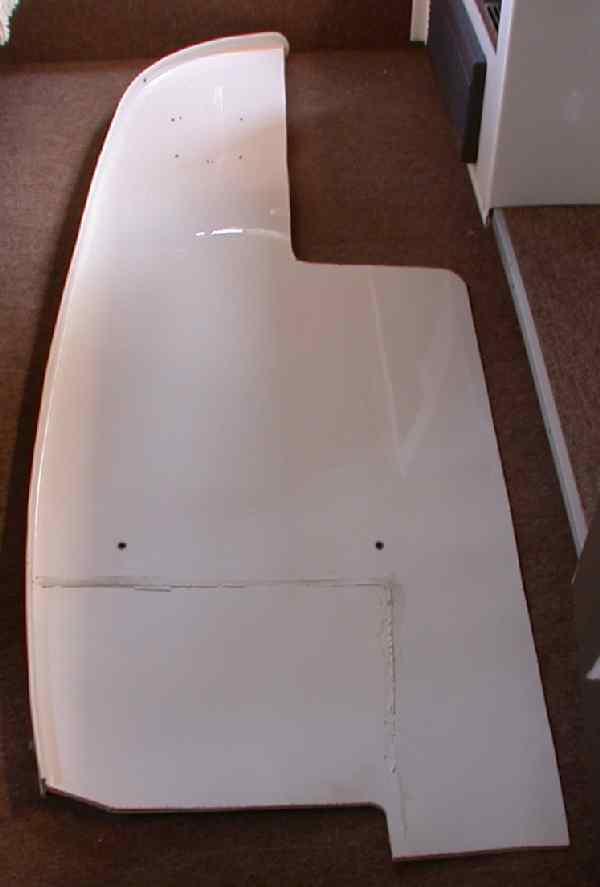
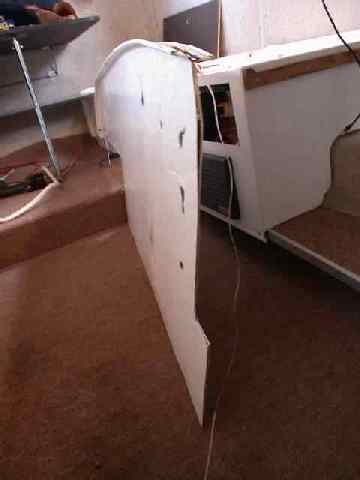
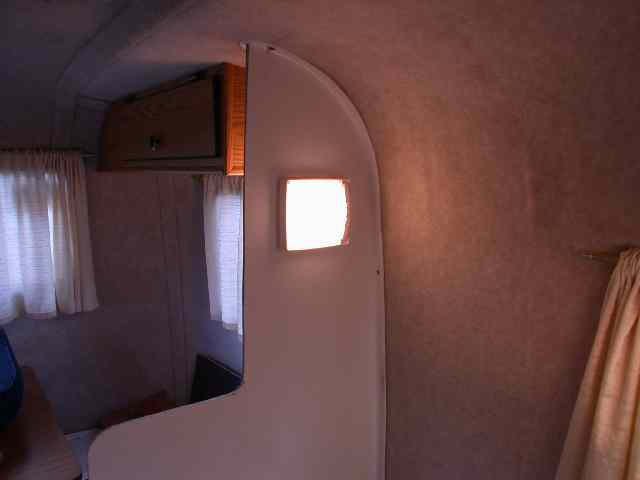
I began by isolating the problem. I removed the drawer to inspect the wiring, and identified two splices that could be bad. I removed these splices, and used a continuity tester to check each wire in the cable that runs inside the bulkhead - the hot wire was bad. Trying to slip the wire out, I find out that the wire is molded into place. I set to work removing the chair that covering the wiring and power converter (12k), and then drilled out the rivets that hold the bulkhead to the trailer.
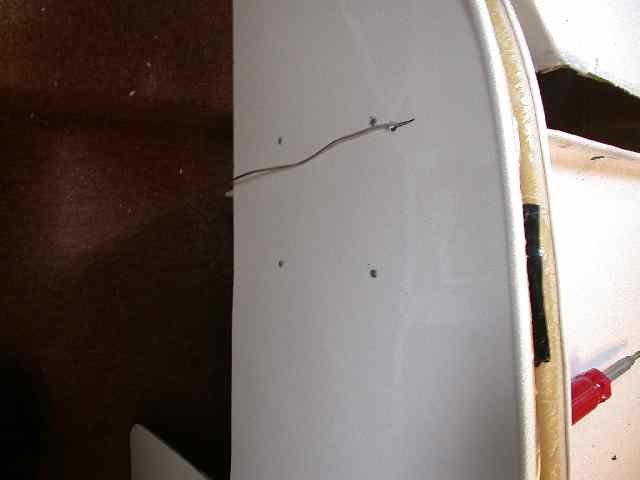
After removing (22k) the bulkhead (19k), I drilled a hole from the back side toward the lamp. This isn't difficult, but one does need to be careful about drilling too close to the finished surface of the bulkhead. I drop a wire into this hole (12k), and run the wire along the surface that gets attached to the trailer, securing it in a couple of places with black electricians tape. The wire comes out at the bottom (10k), in the compartment with all of the other wiring (21k) (Someday this mess will get cleaned up...).
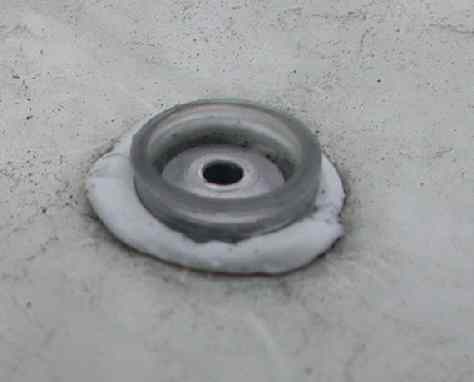
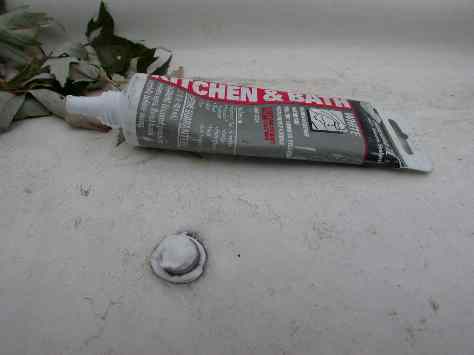
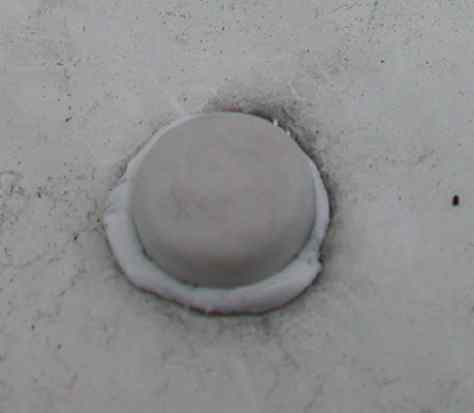
Putting the bulkhead back in place, I prepare to re-rivet it into place. To prevent leaks, I used GE Silicone Seal around each rivet (8k) before setting it in place (9k). I also put a blob of sealer over the rivet (10k) before covering it with a cap (8k).
To cover the mistake made when drilling the hole for the wire, I installed the lamp that was on the back side of the panel on the front side of the panel (21k), and I installed a new lamp on the back side of the panel (18k).
Since I was now using 24 gauge speaker wire, I needed to fuse this wire with a much smaller fuse. Fortunately I had a spare fuse position in my converter, and this circuit now contains a 3 amp fuse. A number 1141 lamp draws 1.44 amps, and I have 2 of them on this circuit, drawing 2.88 amps. I have yet to locate my wiring reference saying how much current a 24 gauge wire can handle, but I suspect 3 amps is well within the limit.
Summer 2002
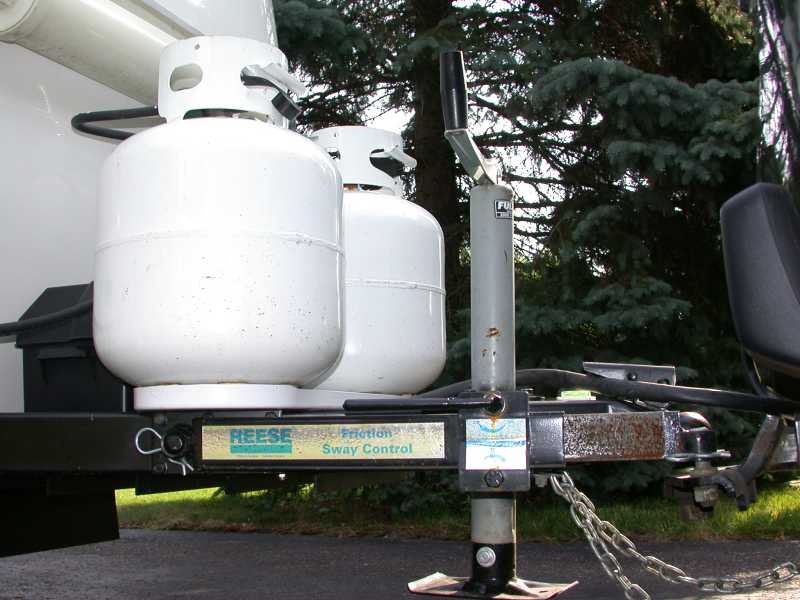
During
our spring 2002 trip to New Mexico, it was decided that a sway control device would be helpful.
We noticed a bit of sway under certain conditions; high speed (65-70 mph or more)
down grade, and side wind. A curve will make the trailer more prone to sway. Any of these
conditions alone will not cause problems, but in concert the trailer will sway, and it is
a bit unnerving. A
Reese friction sway control
(50k)
has been installed. Our
late summer trip to Arizona proved the
problem has been eliminated.
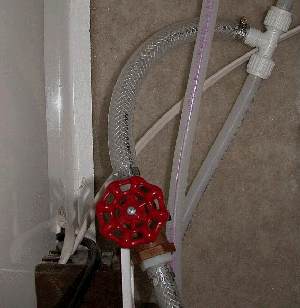
Summer 2002
We have installed a valve that allows the fresh water tank
to be filled (14k) with the supply hose still connected to the city water inlet. To
accomplish this, a T fitting was installed in the line leading to the cold water supply at
the sink and connected to a (new) valve located under the sink. The other side of this
valve was then connected to the gravity feed side
(14k) of the
water pump with another T fitting. Opening this valve allows water to flow from the city
water inlet to the 12 gallon water storage tank. We must be careful when using this valve,
as it may result in pressurizing the fresh water tank when the tank approaches full, and
the overflow water is unable to be vented quickly enough. The regular
"pitcher-spout" water fill is still available for when we are not connected to
city water.
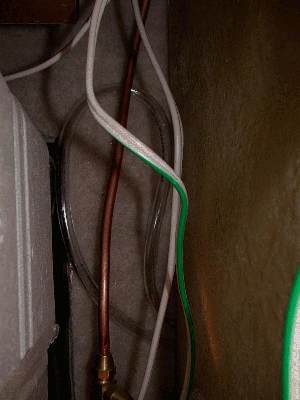
Summer 2002
We had several people have tell us that water is draining out of our trailer while
stopping. We told them it was the fresh water tank overflow, and thanked them for letting
us know of the problem. The solution to this problem was to replace the fresh water tank
vent hose with something else.
The old vent hose attached to the fresh water tank, and made a small loop level with the top of the tank before exiting through the floor of the trailer. It was about 18 inches long overall. The new hose comes out of the tank, goes into the adjoining cabinet and up (14k) 12 inches to under the stove, back down and into the compartment with the fresh water tank, through the old fitting that supported the old vent hose, and finally through the floor. The new hose is six feet long.
Roof A/C Cover Repair
During the summer of 2002 we noticed that the air conditioner cover was not sitting quite right on the air conditioner. Investigation of the trouble revealed that the cover was cracking around the front hold-down nuts and washers. A replacement cover was priced at over $100. Browsing through a Camping World catalog, I saw the answer to this problem; something called an "Air Conditioner Cover Saver", priced at around $20. I ordered the item, and when it arrived I installed it easily in an 15 minutes. It took longer to get the ladder out and put it away that it took to install this product. The cover now sits properly on the A/C unit, and the cracks have not grown any larger.
Spring 2002
After our April trip to Blue Earth, MN to attend a family gathering, it was
noticed that the license plate was gone. Close inspection revealed that the two
plastic tabs the plate was attached to had been broken off. We did not notice
the missing plate until we were
getting ready to leave home on our May trip to New Mexico (see
"trips and pictures" link). We bought a replacement metal
bracket at Hilltop RV, and a new plate at the DMV. The replacement bracket was
installed to the trailer body using holes
drilled into the shell behind the tail lamp.
The result looks factory
installed (54k).
Fall 2004 update:
Last April, we noticed our sleeping bags were a bit damp. Investigation revealed
the likely source of water to be the holes for either the license plate bracket
or the screws that hold the lamp to the trailer. I removed the lamp, applied
silicone to the license plate bracket where it meets the trailer, and
re-installed the lamp with pop rivets sealed with silicone. So far, everything
is dry.
Spring 2002
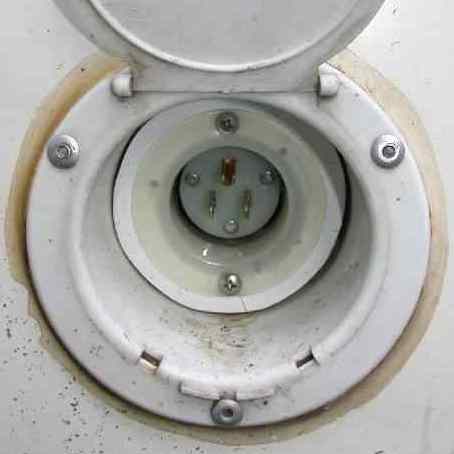
We have replaced the heavy, sometimes messy and always inconvenient 30 amp
power cord on our Scamp with something much more manageable. A
flanged
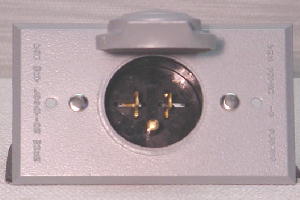
power inlet (12k) has been installed in the standard cable hatch, and wired to an
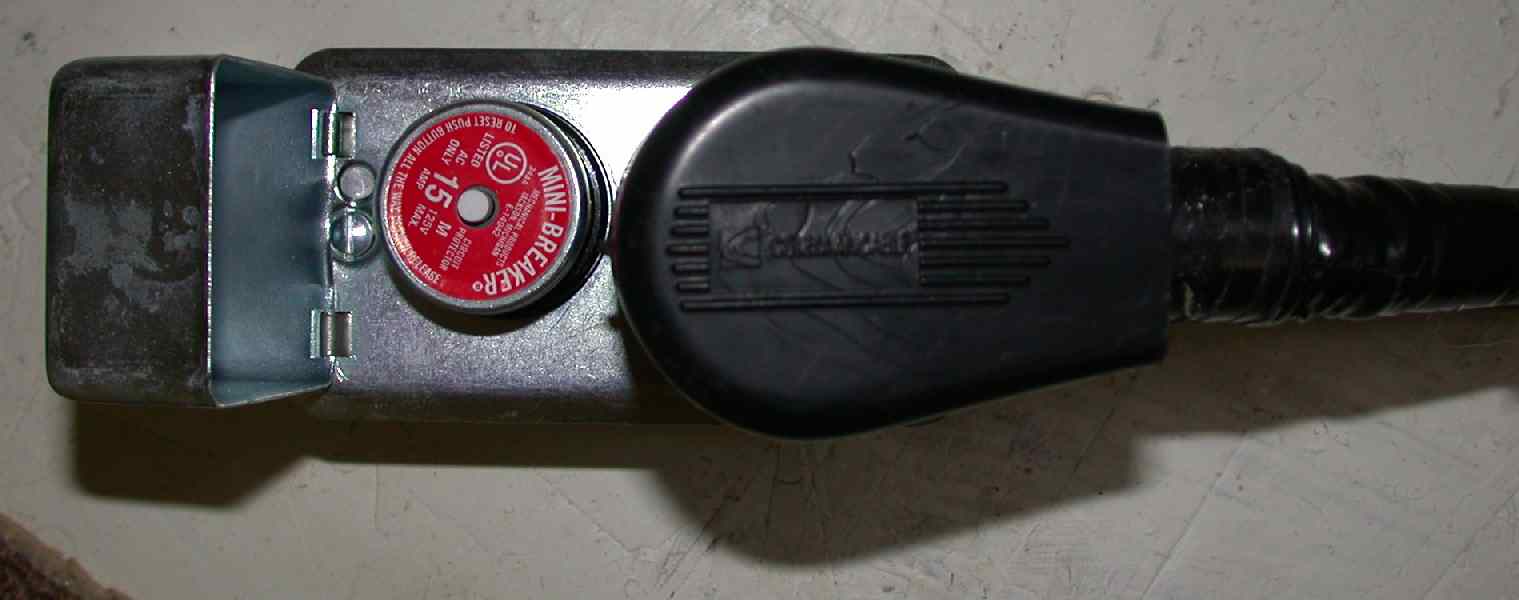
outlet box with a fused outlet (24k). Instead of a fuse,
a 15 amp breaker (42k) has been screwed into the
fuse holder.
This protects the supply cord from being overloaded if we must plug into an outlet larger
than 15 amps. If it turns out that this arrangement does not work well, It can be easily
removed, enabling use of the standard cord that still sits in the bottom of the left-rear
compartment.
To make the inlet fit inside the hatch, a bushing was needed. This bushing was made by using a ShopSmith to cut a 1.75 inch hole in the center of a scrap of 4 by 4 inch lumber that was about 3 inches long. After cutting the hole in the center with a lathe, a band saw was used to cut the outside to about 3 inches in diameter. The bushing was then cut in half to make two thinner bushings. Both bushings were sanded smooth with a belt sander. Using the flanged inlet as a guide, holes were drilled for through-bolts holding this thing together inside the cable hatch (19k). I then spray painted the bushing white and installed it.
Summer
2002 Update:
This is working quite well, even with the load of the air conditioner in the
heat of summer. It was assumed that a 15 amp circuit was more than adequate
because that's what we use at home without any problem. Much testing and measuring voltages
inside the trailer at various loads has proven this
assumption to be true.
Fall
2002 update:
We may have found a metal cover to cover the wiring terminals on the back
of the bushing instead
of using black tape. This modification has worked very nicely all summer long. When I thought of this
project, this is what I had in mind (14k) - This
photo is like the
inlet that was on the tent trailer Dan's family had as a kid. This inlet
was found at Hilltop
Trailer Sales. It is called a "male motor base", and it lists for
$15.33 in their 2001 catalog. If I figure out how to cover the large hole left by the original
cable hatch, I might buy one of these to install.
Late
Fall 2002 update:
After running a 1500 watt heater for a long time, something near the plug on the
original heavy cord gets slightly warm. This will be investigated soon. The
modified inlet does not get the least bit warm under the load of the
heater.
Fall 2003 update:
The source of the heat turned out to be a bad plug on the 30 amp power cord. A
replacement plug was purchased and installed, and the whole assembly does not
get the least bit warm even when under the load of a 1500 watt heater.
Fall 2004 update:
This is still working well, except the factory-installed cord will sometimes
vibrate out of the new
outlet (24k) while traveling.
Fall 2000
The first modification that was made was the addition of telephone and data jacks. A
standard telephone jack and an Ethernet jack
(19k) have
been installed below the rear side-dinette seat. Both of these jacks are connected to
another pair of jacks under the floor (21k). The
outdoor jack has been wired (16k)so that the phone and
Ethernet signals are connected through
one jack, or we can use the regular telephone connection that is available at a
few campgrounds. The outdoor jack is protected from the weather and road debris by a cheap
plastic food storage container. We use a 50 foot patch cable to connect the trailer to
data/phone jacks installed in the both the front and back yard. This modification makes
using the camper as an office while at home as easy and neat as it is to plug it into shore power.
Summer 2002 update: The voice and data jacks are working well, but the cover for the food storage container is beginning to crack. I may need to replace this with something more durable. It has done an admirable job of keeping the outside jacks clean - we even drove down a gravel road in a spring rainstorm in southern Minnesota while towing the trailer. The front of the Scamp turned a chocolate brown color from the mud, but the jack stayed clean and dry inside the cover.
Fall 2002 update: Still have not replaced the protective container cover. The cover is still protecting the outside jacks, and they are still serviceable. The cracks are getting larger.
Fall 2003 update: The cable that I buried between the house and the jack near where the camper is parked in the backyard went bad. A replacement cable has been installed, but not yet buried in the ground. The plastic container that protects the jack is in bad shape and needs to be replaced, but the jack itself is still OK.
Winter 2003 update: I finally equipped the house with a wireless network, and it works in the camper! I may not bury the new network cable if I come up with a good wireless telephone.
Fall 2004 update: Since my wireless network does not cover the whole backyard, I threw in the towel and put a new cable in the ground between the house and storage shed. Last spring I also replaced the plastic container that keeps dirt and crud of the outside jack on the trailer.
February 2008 Update: This telephone / ethernet connection has been working without any problems since 2003.
We want to install a switch to turn on the back up lights when they are needed.
The lamps were installed at the factory as standard equipment, and are
documented in the owners manual as "foreign stop". We have
not decided where to put the switch. This idea was tested in mid-September 2002 by turning on
the backup lights with a jumper wire. It was a tremendous help backing the trailer in the
dark.
Update I: In mid-November 2002, I turned the back-up lights on
(with the jumper wire mentioned above) to get the camper
into the back yard for winter storage, and a few days later noticed that the
tail lamp lenses were melted over each bulb. This modification may not get
implemented unless I come up with a work-around for this problem. Maybe smaller
wattage bulbs will help.
Update II: When we bought our new GMC Envoy in July 2006, the backup
lights were already wired into the trailer plug. They are a great help when
backing the trailer in the dark, and work very nicely.
Installing a section of clear vinyl tubing into the supply side of the water pump and overflow tube, and attaching it where it may be seen, will indicate water level in the fresh water tank. We have decided a good place for this hose is in the cabinet under the stove.
20090306 drm
The fine print: All standard disclaimers plus the following disclaimer apply: Only you are responsible for the consequences of using this information. Not Dan Meyer, Scamp, RVIA, Yahoo! Groups, any government or government agency of the United States of America, or any other inhabitant or organization of any kind in the known or unknown universe listed or not listed here or elsewhere will accept the responsibility for your use of this information. It is completely up to you to determine how you use this information and by visiting this web page you do accept all responsibility for any and all consequences of your use or non-use of this information. This information applies even if you do not read or understand this paragraph.